Set up your business: the wizard
Who can do this: Owner
Setup has four steps, in the app and on the web at app.welcomebird.com. The bar at the top says where you are, for example Step 2 of 4. You can skip the hours (and, in the app, the service) and finish them later, and you can stop at any step and carry on in the other place: your business, hours and services are saved as you go.
- 1Sign up
Email or phone, then a 6-digit code
Where On the web or in the app
One account for both.
- 2Choose
Set up my business
Where Right after you sign up
An invite waiting shows first.
- Joining a teamSomeone invited you
- 3Set upThis page
Four short steps
- About
- Hours
- Services
- Link
Where On the web or in the app
Saved as you go. Finish later if you like.
- 4Go live
Your page is live
Where The last setup step
Confirm your email first if asked.
- 5Share
Your link and QR code
Where On Today or Your page is live
Customers book with no account.
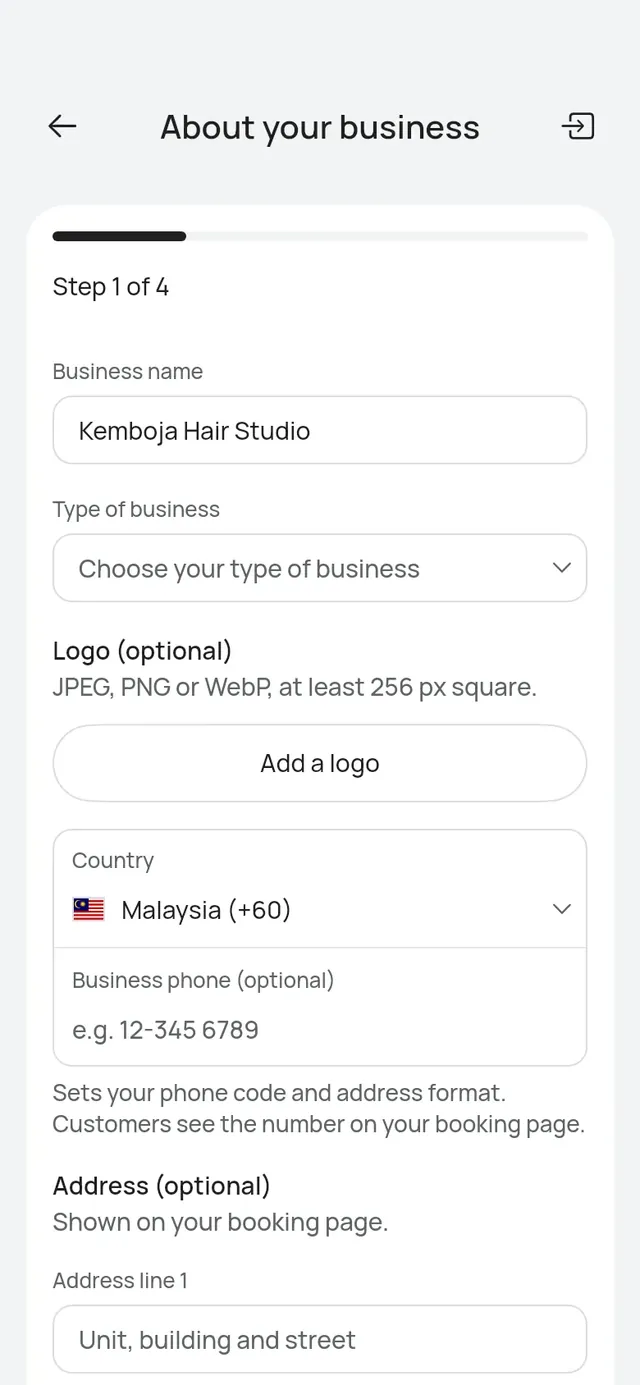
Step 1: About your business
Fill in:
- Business name: customers see it on your booking page and in their messages.
- Type of business: for example Hair salon, Clinic or Sports courts. A restaurant or café picks Restaurant or Café under Food & drink. The type sets some of the words the app uses. A Health type says patient and doctor. See Clinics. You can’t change the type after your first booking.
- Country and Business phone (optional): the country sets your phone code and address format. Customers see the number on your booking page.
- Time zone: your bookings use this time zone.
- Currency: prices are shown in this currency. It can’t change once prices use it.
The app also asks for a Logo (optional), a JPEG, PNG or WebP picture at least 256 px square, and an Address (optional) for your booking page. On the web, add them later in the app: More → Business profile. See Profile.
Tap Create my business. If the next step takes a moment, the web says We’re still setting up your business.
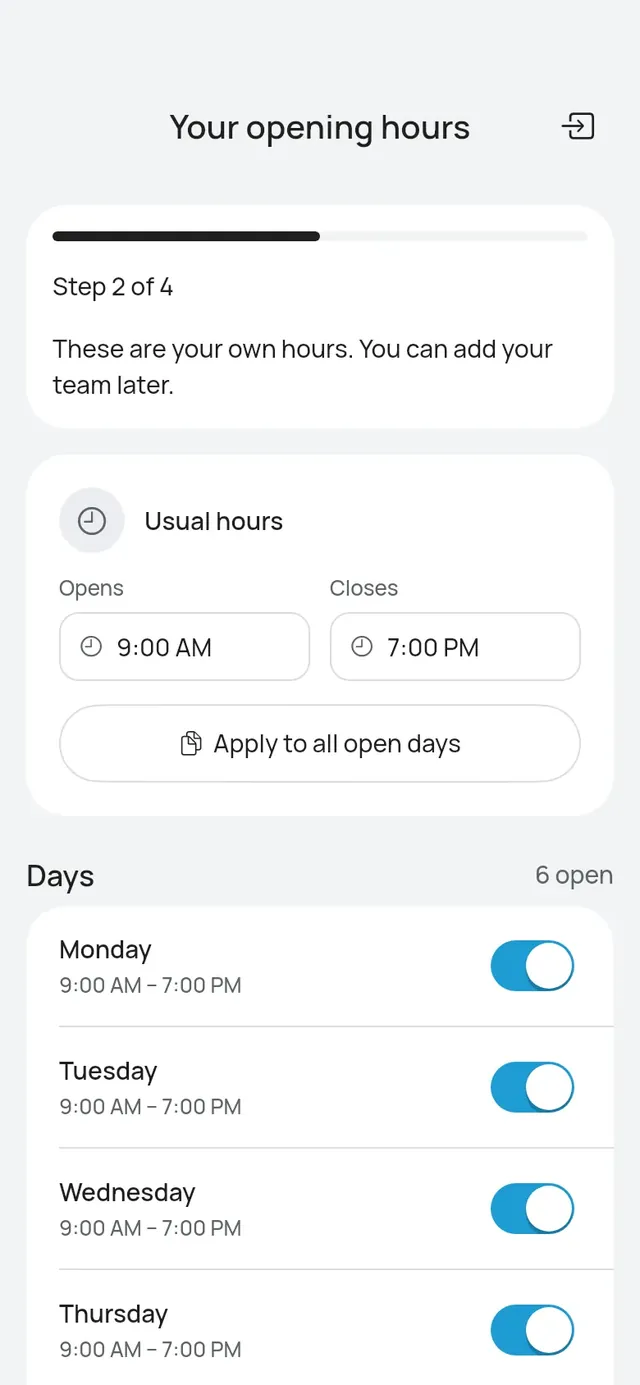
Step 2: Your opening hours
In the app:
- Set Usual hours with Opens and Closes. Every open day uses them, unless it has its own times.
- Under Days, switch off the days you are closed. A day with its own times shows Different: Apply to all open days puts it back on the usual hours.
- Tap Save hours.
Your opening hours on the web
On the web, the step is the same with these words: Usually opens and Usually closes, then one row per day with a switch. A closed day shows Closed.
These are your own working hours. You add your team later. Not sure yet? Tap Skip for now.
Step 3: Your services
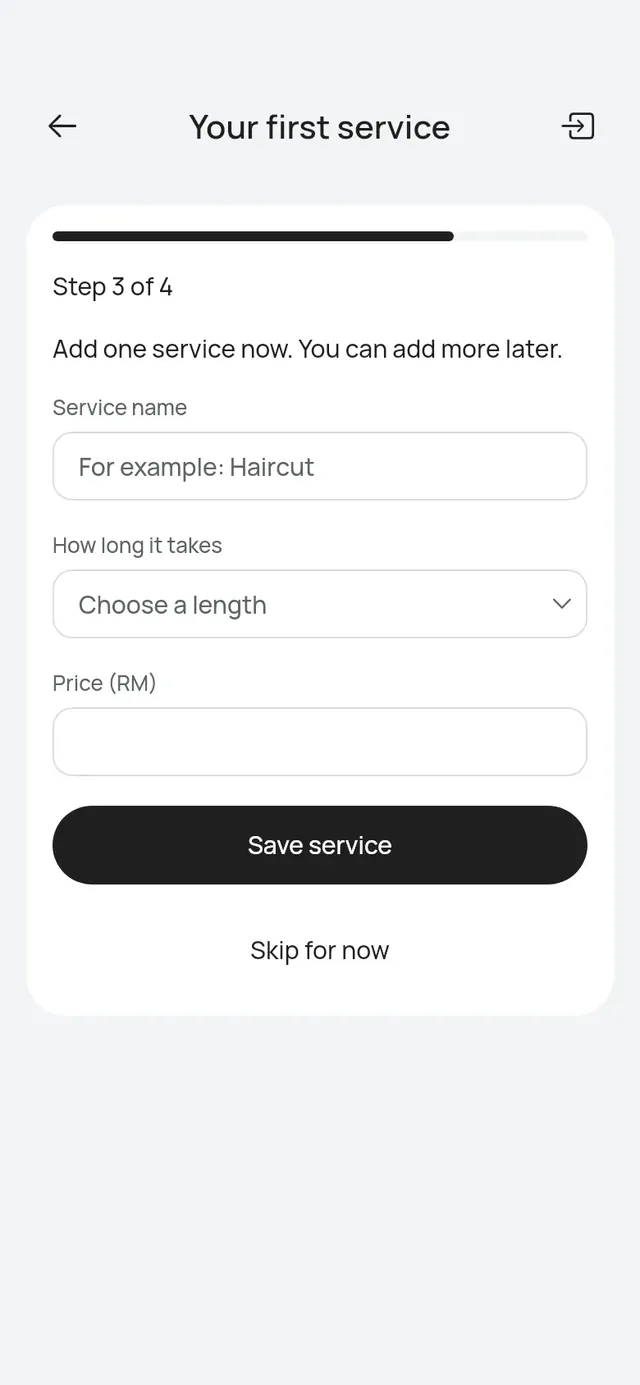
In the app, the step is Your first service:
- Type the Service name, for example Haircut.
- Choose How long it takes.
- Enter the Price.
- Tap Save service.
Your services on the web: add several
On the web, the step is Your services, and you can add several:
- Type the Service name, for example Signature facial.
- Choose How long it takes. For a length not in the list, choose Another length and type the minutes.
- Enter the Price.
- Tap Add service. It joins the list with its length and price, and the page shows how many are saved.
- Add the next one the same way. To take one out, tap its remove button. Undo brings it back for a few seconds.
- Tap Continue.
You need at least one service to continue on the web. In the app you can tap Skip for now and add it later. You can add more any time in the app. See Services.
A sports courts business, a restaurant and a café skip this step. They set up courts or tables in the app after going live.
Sports courts, restaurants and cafés
A sports courts business skips this step. You add your sports and courts in the app, in More → Courts, after you go live. See Courts.
A Restaurant or Café skips it too. The step, What customers can book, says “You’ll add your tables in More → Tables after going live.” Customers choose how many people and a time, and each booking gets the smallest free table that fits. On the web it says “In the app, you’ll add your tables in More → Tables after going live.” Tap Continue. No service is made: your tables are what customers book. See Tables.
Courts and tables are set up in the app only. You can still sign up, set up and go live on the web.
Step 4: Your booking link
Choose the name of your booking link and put your page live. See Go live.
The preview on the web
On a computer, the web shows your booking page beside each step as you fill it in: the name and type, today’s hours, your services and, on the last step, your link. Nothing is public until you tap Go live.
Finish later
You can stop at any step and carry on later, on the web or in the app.
How to finish later
On the web, tap Finish later at the top of any step. The dashboard opens, with a Finish setting up card: tap Continue setup to go back to the first step not done yet. The next time you log in on the web, setup opens at that step.
In the app, Today shows Finish setting up with each step marked Done or To do. Tap a step to finish it. A business you started on the web shows here too.
At a restaurant or café, the step is Add your tables. It is Done once a table that is not paused has opening hours. Tap it to open Tables.